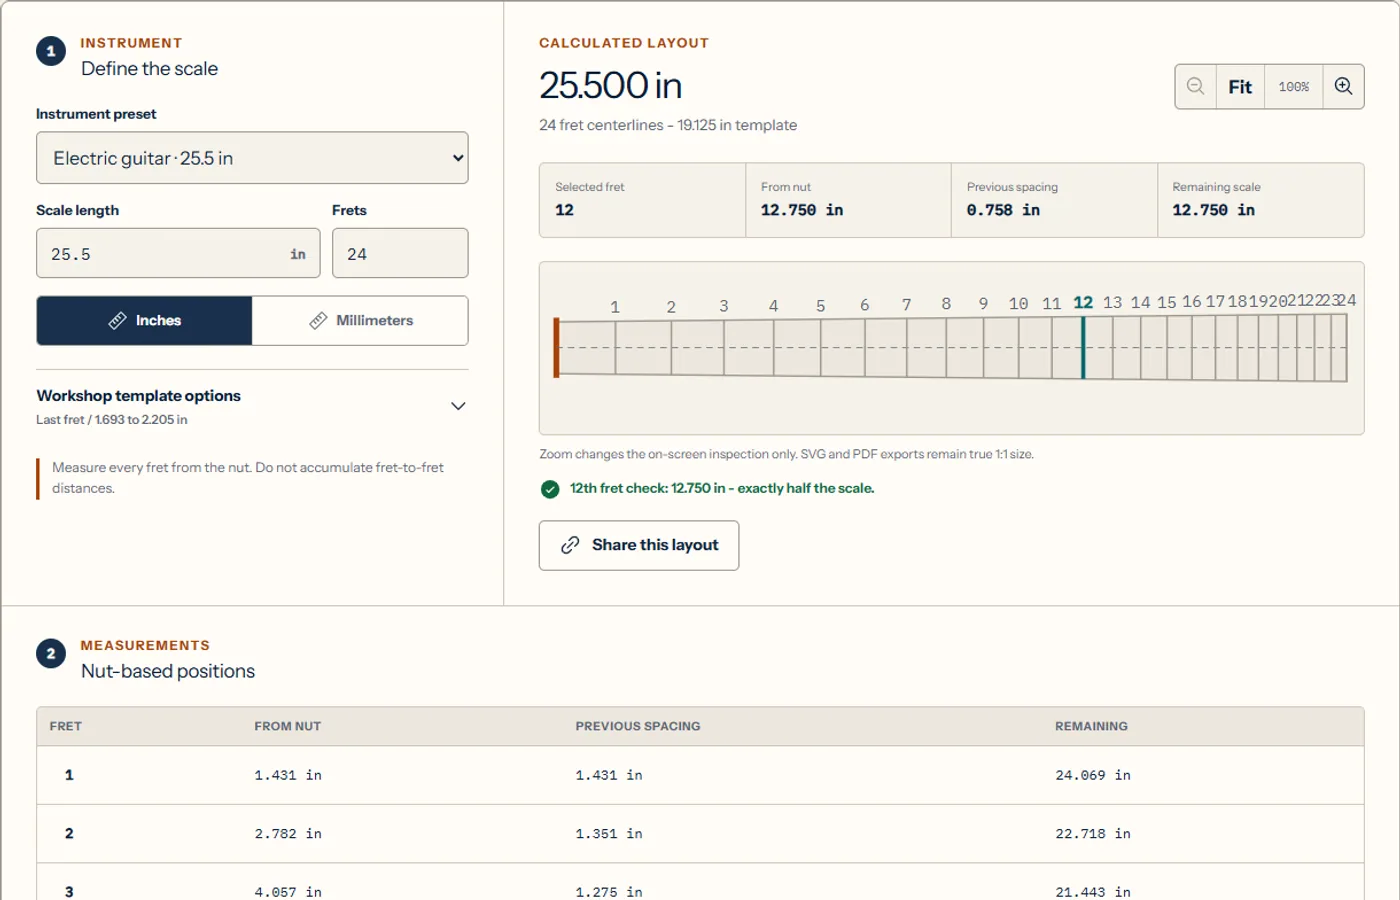
If you are building or replacing a fretboard, a printable fret template saves time only when the physical output matches the calculated scale. This guide follows the same workflow we use to test Musician Tools: define the instrument, choose the physical end of the template, export a true-size file, verify its ruler, then check one known fret before a saw touches wood. The goal is simple: turn accurate numbers into an accurate object.
01
What you need before creating a full-scale fret template
Gather the scale length, fret count, unit, and the physical width of the board at the nut and its far end. Use the instrument’s actual design dimensions rather than a label such as “standard guitar.” Two instruments sold as the same scale can still differ in board width, final-fret count, and the amount of material left beyond the last slot.
For equal-tempered frets, the distance from the nut to fret n is dₙ = L × (1 − 2⁻ⁿ⁄¹²). That makes the 12th fret exactly half the theoretical scale length—a useful independent check later.
02
Create the printable fret template from manufacturing inputs
1. Enter scale length and fret count
Open the fret calculator and printable layout tool, choose a close preset, then replace the preset values with your measured design. Keep units consistent. Converting halfway through a hand calculation is a common source of rounding and transcription errors; the tool can switch the display without changing the stored geometry.
2. Choose where the physical template ends
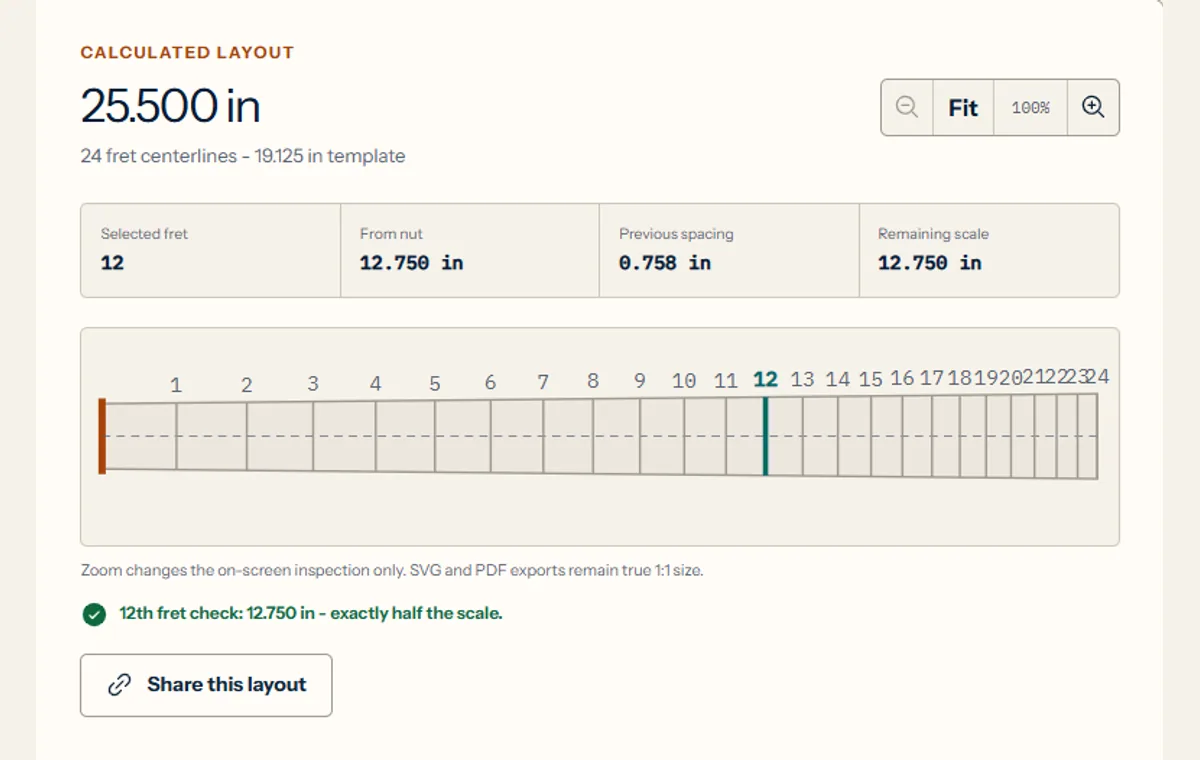
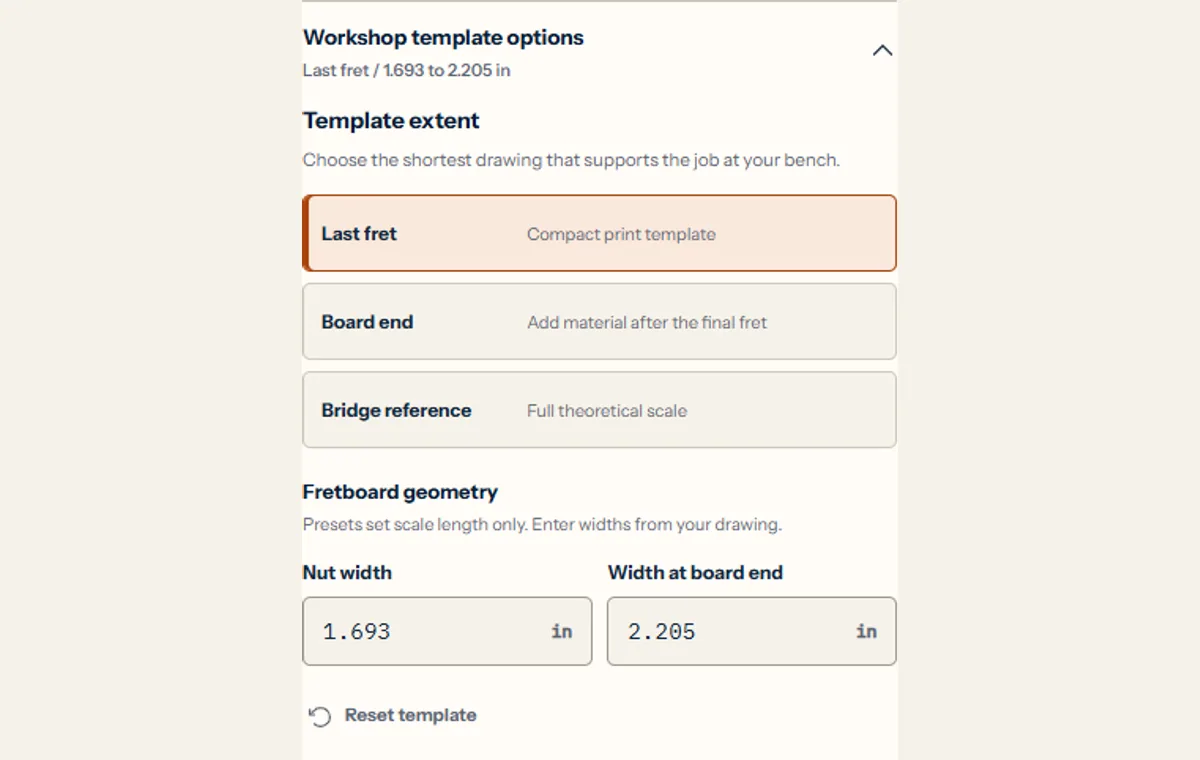
This decision should match the job on the bench. A last-fret template is compact. A board-end template includes the margin beyond the last fret and shows the real tapered board. A bridge reference extends only the center reference line to the theoretical bridge; it does not pretend the wooden board continues that far.
3. Inspect the preview before export
Zoom into the nut, final fret, board end, and bridge reference. Confirm the taper moves in the expected direction and select a few rows in the measurement table. At this stage you are checking intent: the software cannot know that you typed 24.75 inches when your drawing called for 25.5.
03
Export and print the fret template at actual size
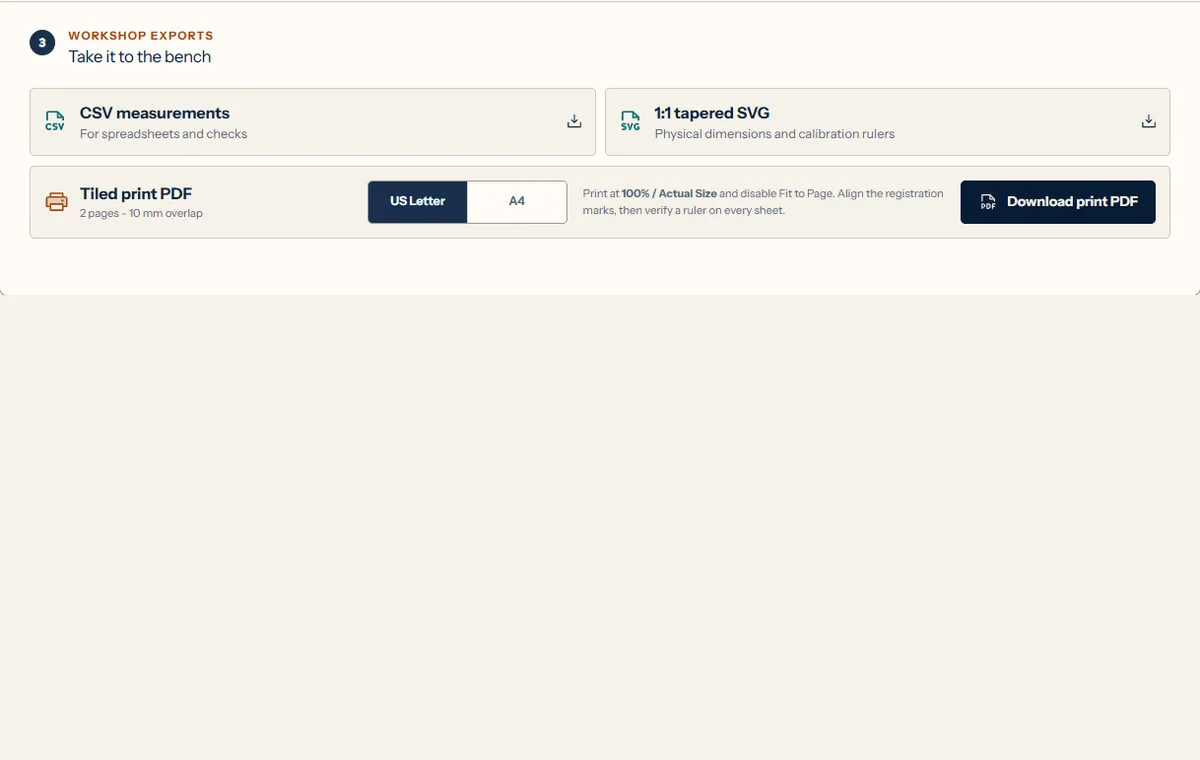
Use SVG when a print shop, laser workflow, or CAD application can preserve vector dimensions. Use the tiled PDF for an ordinary Letter or A4 printer. Both formats should remain vector-based so fret centerlines stay crisp at full scale.
Use these print settings
Select Actual size or 100%. Turn off Fit, Shrink oversized pages, and any borderless option that applies automatic enlargement. Print one test page before committing the full set.
Join tiled pages by the marks, not by the paper edges
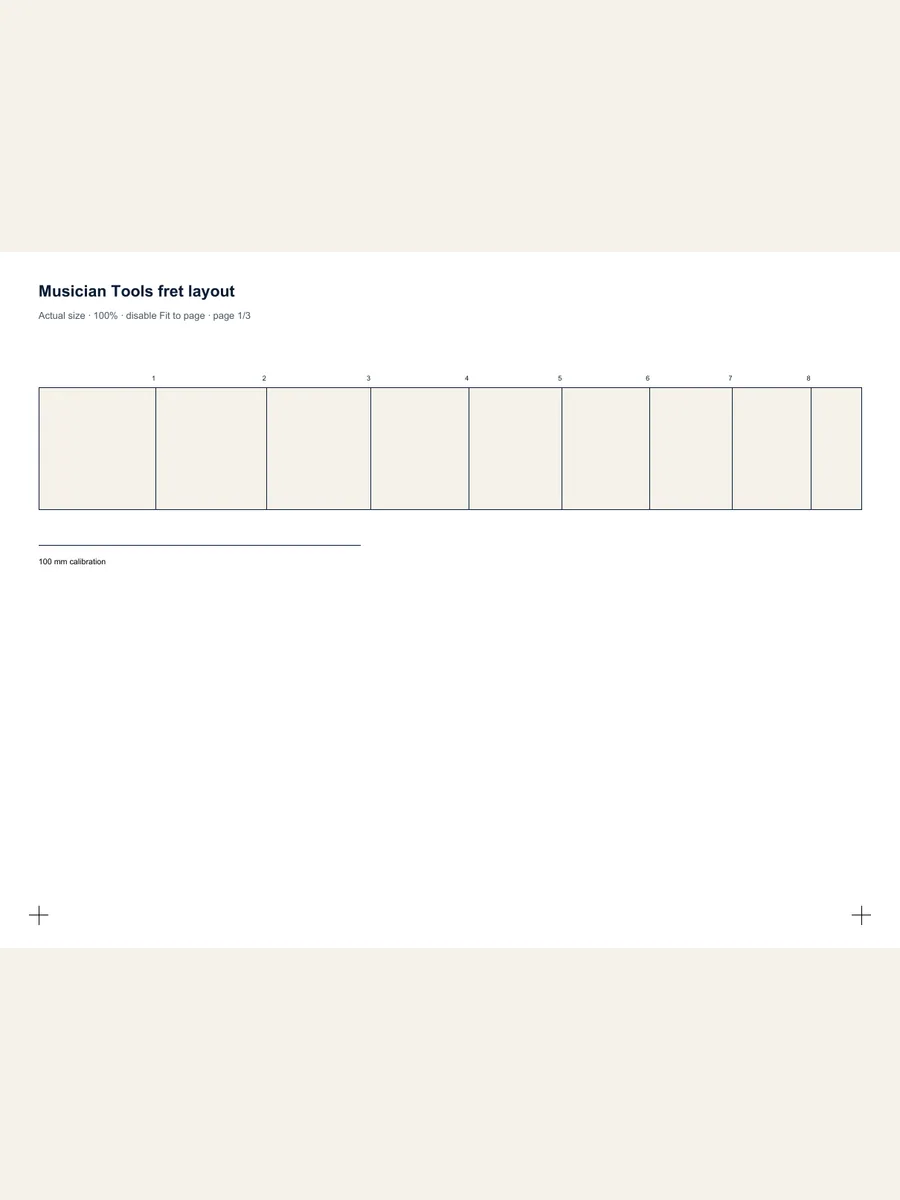
Home printers rarely place artwork at an identical distance from every sheet edge. Trim one side of the overlap, align the printed registration marks and the continuous centerline, then tape the sheets while they are flat. The 10 mm overlap is working space; it is not another dimension to add to the scale.
04
Verify the paper layout before cutting fret slots
Treat the printed sheet as a new measurement tool that must be calibrated. First measure the 100 mm or 4 inch reference ruler. Then check the nut-to-12th-fret distance. On a 25.5 inch scale, the 12th fret centerline must be 12.750 inches from the nut. Finally, check the last fret and make sure page joins have not introduced a step or skew.
| Check | Expected result | Why it matters |
|---|---|---|
| Calibration ruler | 100 mm / 4.000 in | Detects printer scaling |
| 12th fret | 12.750 in from nut | Checks half-scale geometry |
| Last-fret extent | 2 Letter pages | Checks tiling and overlap |
| Bridge reference extent | 3 Letter pages | Confirms the reference line is included |
Bench rule: if the printed ruler is wrong, stop. Do not compensate by moving individual fret marks; fix the print scale and print again.
05
Five mistakes that ruin an otherwise accurate fret layout
- Printing with Fit enabled. A small percentage error compounds across the full board.
- Measuring from page edges. Fret positions are measured from the nut reference, not the paper margin.
- Treating lines as slot edges. The exported marks are centerlines; your saw kerf is a separate manufacturing choice.
- Confusing board end with bridge position. The physical fretboard usually ends well before the theoretical bridge reference.
- Skipping the paper check. A correct file does not guarantee a correctly scaled printer output.
A mathematical fret layout does not include saddle compensation, nut compensation, multiscale fan geometry, or temperament changes. Use a design built specifically for those cases.
06
Printable fret template FAQ
Should I use SVG or PDF for a full-scale fret template?
Use SVG for CAD, a print shop, or a wide-format vector workflow. Use a tiled PDF for a home Letter or A4 printer. Both can be accurate when printed at 100%.
How do I know the fret template printed at the correct scale?
Measure the included 100 mm or 4 inch ruler with a reliable physical ruler. Then confirm that fret 12 is exactly half the scale length from the nut.
Are fret positions measured to the center of each slot?
Yes. The layout marks fret centerlines. Do not treat those lines as the two edges of a saw kerf.
Can I use the bridge reference as a compensated saddle location?
No. It is the theoretical scale-length reference. Saddle compensation depends on the instrument, string, setup, and playing conditions.
Can this workflow create a multiscale or fanned-fret template?
No. The current tool produces single-scale, 12-tone equal-tempered layouts. A multiscale design needs separate bass and treble scales plus a chosen perpendicular fret.
Ready for the bench
Calculate once. Verify twice. Cut once.
The reliable workflow is short: enter the real dimensions, inspect the intended extent, export a vector layout, print at 100%, and verify both the calibration ruler and the 12th fret. Keep the checked paper template with your build notes so the layout remains traceable later.